Get Started with Google Shopping Ads: A 2026 Guide
Table of Contents
-
What You Need Before You Get Started with Google Shopping Ads
-
How to Optimize Your Google Shopping Feed for Better Results
Last Updated: May 14, 2026
If you sell products online and you have not yet tapped into Google Shopping, you are leaving a significant amount of visibility on the table. This guide from Embed360 walks you through exactly how to get started with google shopping ads, from creating your accounts to launching your first campaign and optimizing it for real returns. Below, we cover every step in sequence, plus the feed optimization and troubleshooting angles that most setup guides skip entirely.
Most tutorials stop at “click the button and launch.” This one does not. The real challenge is not creating a campaign; it is making sure your product data is clean, your conversion tracking is live, and your bidding strategy matches your margin structure. Get those three things right and Google Shopping becomes one of the most efficient paid channels available to product sellers.
What You Need Before You Get Started with Google Shopping Ads
Before a single ad goes live, two accounts must exist and be linked: Google Ads and Google Merchant Center. Skipping this prerequisite step is the most common reason new advertisers stall out before their first impression.
Google Shopping ads are product-based ads that pull directly from a product feed you upload to Google Merchant Center. Unlike search ads, you do not write ad copy or bid on keywords manually. Google matches your product data to relevant queries automatically, which means the quality of your product feed determines the quality of your traffic.
Sign Up for Google Ads and Google Merchant Center
Start by creating a Google Ads account at ads.google.com if you do not already have one. The signup process asks for your business information, billing details, and a primary goal. You can skip campaign creation during signup; just get the account live.
Next, create a Google Merchant Center account at merchants.google.com. You will need to:
-
Enter your business name and country
-
Verify and claim your website domain (via DNS record, HTML tag, or Google Analytics)
-
Confirm your shipping and return policies
-
Accept the Merchant Center terms of service
Website verification is where many sellers get stuck. The DNS method is the most reliable if you have access to your domain registrar. HTML tag verification works well for Shopify and WordPress stores where you can paste code into the site header.
Link Google Merchant Center to Google Ads
Once both accounts exist, link them so your product feed flows into your campaigns. Inside Merchant Center, go to Settings, then Linked Accounts, and enter your Google Ads customer ID (the 10-digit number in the top right of your Google Ads UI).
The link request appears in Google Ads under Tools and Settings, then Linked Accounts. Approve it there. This account linking step is required; without it, you cannot select products when building a Shopping campaign.
Pro TipYour Merchant ID appears in the top-right corner of Merchant Center. Keep it handy. You will need it when working with the Google Ads API or troubleshooting feed ingestion issues.
How to Upload Your Product Feed and Inventory Data
Your product feed is the engine behind every Google Shopping ad. Google pulls product titles, images, prices, and availability directly from this feed to generate your ads. A clean, complete feed drives better ad matching and higher click-through rates. A sloppy feed produces disapprovals and wasted spend.

A person sitting at a desk reviewing product listings on a laptop screen, with a notepad and coffee nearby, in a clean home office setting with warm natural light coming through a window
The most common feed format is a Google Sheets file or a compressed text file (.txt or .xml) submitted via the Feeds section in Merchant Center. You can also use a scheduled fetch, where Merchant Center pulls your feed from a URL on your server at regular intervals.
If you use Embed360, this process is handled automatically. Embed360 syncs your product listings, images, pricing, and inventory to Google Shopping in real time, eliminating the manual work of updating feed files whenever your stock or prices change.
Required Feed Attributes and Product Data Fields
Google requires specific feed attributes for every product. Missing required fields causes immediate disapproval. The core required attributes are:
-
id: A unique identifier for each product (SKU or internal code) -
title: The product name (this is your most important ranking signal) -
description: A detailed product description with relevant terms -
link: The URL of the product page on your website -
image_link: A high-quality product image URL (minimum 100×100 pixels for non-apparel) -
price: The current price in the correct currency format -
availability: One ofin stock,out of stock, orpreorder -
condition:new,used, orrefurbished -
brand: The product brand name -
gtinormpn: Global Trade Item Number or Manufacturer Part Number (required for branded products)
Additional attributes like product_type, google_product_category, color, size, and material are optional but improve matching accuracy significantly.
Common Disapproval Reasons and Policy Violations to Avoid
Policy violations are the fastest way to kill a Shopping campaign before it starts. According to Google Merchant Center Help documentation, the most frequent disapproval reasons include:
-
Price mismatch: The price in your feed does not match the price on your landing page. Google crawls your site to verify this.
-
Unavailable landing page: The product URL returns a 404 error or redirects to a homepage.
-
Missing required attributes: No GTIN for branded products, or missing
availabilityfield. -
Prohibited content: Products that violate Google Shopping policies (counterfeit goods, certain health claims, weapons).
-
Image quality issues: White-label images, watermarked images, or images with promotional text overlaid.
The fix for most disapprovals is straightforward: audit your feed attributes, confirm your landing pages are live, and verify that prices match exactly, including tax display conventions for your sales country.
Watch OutDo not launch a campaign while products are disapproved. Disapproved items do not serve, but they can mask performance issues and skew your campaign metrics. Resolve all disapprovals in Merchant Center before going live.
How to Optimize Your Google Shopping Feed for Better Results
Feed optimization is where most guides on how to optimize google shopping feed stop at surface-level advice like “use good titles.” Here is what actually moves the needle.
Product titles are the single highest-impact feed attribute you can optimize. Google treats the title like a keyword field. For physical products, front-load the most important terms: brand, product type, key attribute (size, color, material), and model number. A title like “Blue Ceramic Coffee Mug 12oz Handmade” outperforms “Coffee Mug” in almost every test.
Product images affect click-through rate more than any other visual element. Use clean, white-background images for most categories. Lifestyle images work for apparel and home goods. Avoid images under 800×800 pixels; Google prefers higher resolution, and Shopping ads display prominently enough that pixelated images are visible.
Google product categories help Google understand where your product fits. Use the most specific category available from Google’s product taxonomy reference. A vague category like “Apparel” loses to a specific one like “Apparel & Accessories > Clothing > Tops & Tees > T-Shirts” for matching precision.
Custom labels are underused. You can add up to five custom label columns to your feed and use them to segment campaigns by margin, seasonality, or product tier. For example, label your highest-margin products as “high-margin” and create a separate campaign for them with a more aggressive ROAS target.
Embed360’s AI-powered listing optimization automatically generates optimized product titles and descriptions, which means your feed attributes are structured for both search relevance and policy compliance from the start, without manual rewriting for each product.
Create Your First Google Shopping Campaign Step by Step
Total Time: 20-30 minutes Difficulty: Beginner
Creating a Shopping campaign in Google Ads is a structured process. Follow these steps in order.
Choose a Campaign Goal and Campaign Subtype
Inside Google Ads, click the blue “+” button to create a new campaign. You will be prompted to select a goal. For most product sellers, choose “Sales” or “Product and brand consideration.” You can also select “Create a campaign without a goal’s guidance” if you want full control.
On the next screen, select “Shopping” as the campaign type. Google will then ask you to choose a campaign subtype:
-
Standard Shopping: Manual control over bidding, product groups, and campaign structure. Best for advertisers who want granular control.
-
Performance Max: Google’s automated campaign type that serves across Search, Display, YouTube, Gmail, and Shopping simultaneously using machine learning.
Select your Merchant Center account and your sales country. The sales country determines which inventory is eligible to serve and which currency Google uses for reporting.
Set Your Campaign Budget and Bidding Strategy
Your campaign budget is a daily average. Google can spend up to twice your daily budget on high-traffic days, but averages out over the month. Start conservatively; you can always increase it once you see performance data.
Bidding strategy options for Shopping campaigns include:
-
Target ROAS (tROAS): Google automatically adjusts CPC bids to hit your target return on ad spend. Requires conversion tracking with revenue values.
-
Maximize Clicks: Google spends your budget to get as many clicks as possible within your CPC limit. Good for new campaigns with no conversion history.
-
Manual CPC: You set individual bids per product group. Maximum control, maximum time investment.
For new campaigns with no data, start with Maximize Clicks and a manual CPC cap. Once you have 30-50 conversions tracked, switch to Target ROAS. Automated bidding performs poorly without conversion history to learn from.
Configure Product Groups and Sales Country
Product groups let you organize your inventory within a campaign and set different bids for different product segments. By default, Google creates one product group called “All Products.”
You can subdivide product groups by:
-
Brand
-
Category
-
Product type
-
Item ID
-
Custom label
-
Condition
A practical starting structure: split your product groups by category first, then by custom label (margin tier or price tier). This gives you enough granularity to bid differently on high-value products without over-complicating your campaign from day one.
Google Shopping Campaign Structure Best Practices
The biggest mistake with google shopping campaign structure is treating it as a one-time setup. Your campaign structure should evolve with your data.
A common approach for established advertisers is the “priority campaign” method. You run three campaigns for the same products with different priority settings (High, Medium, Low) and different budgets. The high-priority campaign captures branded searches with aggressive bids. The medium-priority campaign handles generic category terms. The low-priority campaign catches everything else with conservative bids.
This structure gives you bid control that a single campaign cannot provide, because Google Shopping does not let you bid on specific keywords directly.
For smaller catalogs (under 500 SKUs), a simpler two-campaign structure works well:
|
Campaign |
Priority |
Products |
Bidding |
|---|---|---|---|
|
Best Sellers |
High |
Top 20% by revenue |
Target ROAS |
|
Everything Else |
Low |
Full catalog |
Maximize Clicks |
|
Clearance |
Medium |
Discounted inventory |
Manual CPC |
Keep your campaign structure as simple as your data can support. Complexity without data to back it is just noise.
Key TakeawayThe priority campaign method is the most effective google shopping campaign structure for controlling where your budget goes without sacrificing reach. Start simple, add complexity only when data justifies it.
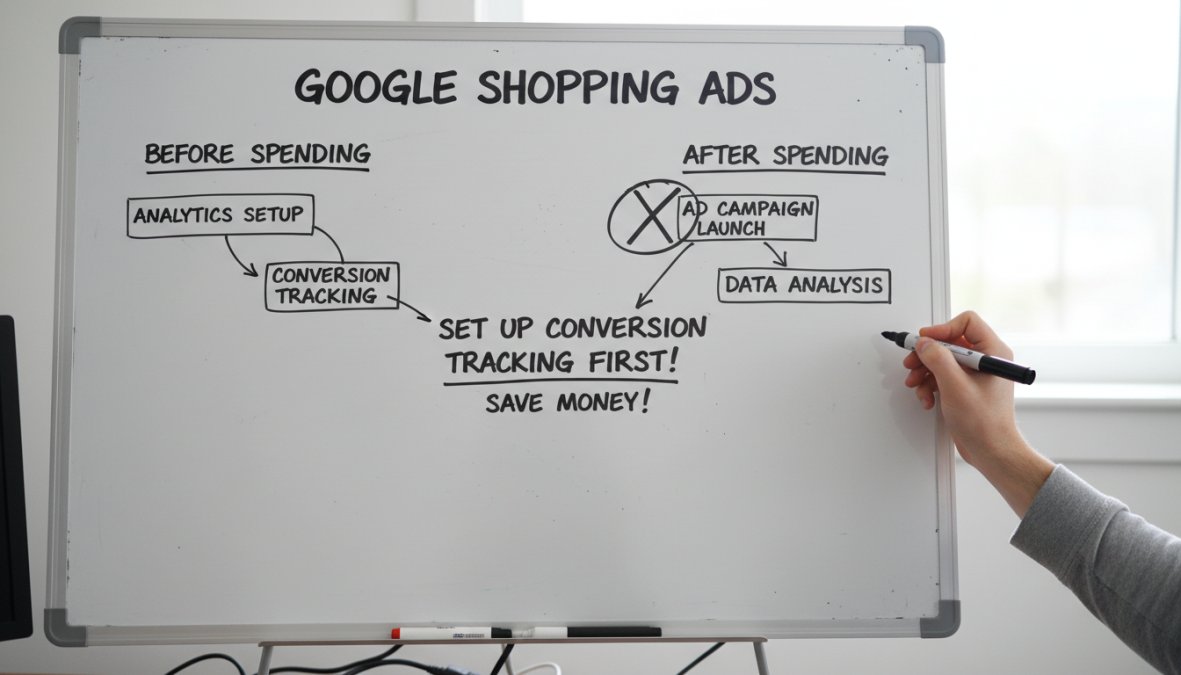
Set Up Conversion Tracking Before You Spend a Dollar
Conversion tracking is not optional. Without it, you are flying blind on which products and queries actually drive sales, and your automated bidding strategies have nothing to optimize toward.
Google Shopping conversion tracking works by placing a Google tag on your website that fires when a user completes a purchase (or another defined action). The tag passes conversion data back to Google Ads, including the transaction value if you configure it correctly.
To set up conversion tracking:
-
In Google Ads, go to Tools and Settings, then Conversions
-
Click the “+” button and select “Website”
-
Choose “Purchase” as the conversion action
-
Set the value to “Use different values for each conversion” and map it to your order total
-
Install the global site tag and the event snippet on your order confirmation page
-
Verify the tag is firing using Google Tag Assistant
Close-up of hands typing on a laptop displaying a Google Ads dashboard with analytics data visible on the screen, shot in a modern office with soft overhead lighting
Revenue-based conversion values are critical for Target ROAS campaigns. If you pass only a “1” for every conversion, Google cannot differentiate between a $10 sale and a $500 sale. Pass actual transaction values so the algorithm optimizes toward your most profitable orders.
As documented in Google Ads conversion tracking setup guide, you should verify that your conversion tag fires on the confirmation page and not on the cart or checkout page, which would inflate your conversion count with incomplete purchases.
Google Shopping Ads Best Practices to Maximize ROAS
Google Shopping ads best practices come down to three levers: feed quality, bid strategy, and negative keywords.
Feed quality is covered above. On bidding: resist the urge to set an aggressive ROAS target too early. A Target ROAS of 800% sounds great, but if your account does not have enough conversion volume to support it, Google will throttle your impressions to the point where you barely serve. Set a realistic initial target based on your actual margins, then tighten it as volume grows.
Negative keywords are the underrated tool in Shopping. Because Shopping campaigns match based on product data rather than keyword lists, Google can match your products to irrelevant queries. Review your Search Terms report weekly and add negatives aggressively in the first 30 days. Common negatives include competitor brand names, “free,” “DIY,” and category-adjacent terms that attract browsers instead of buyers.
Qualified leads matter more than raw click volume. A lower click-through rate on a tightly matched query is better than a high click-through rate on an irrelevant one.
Standard Shopping vs Performance Max: Which Should You Use?
Standard Shopping gives you control. Performance Max gives Google control. The right answer depends on your situation.
Standard Shopping is the better starting point for most advertisers. You can see exactly which product groups are spending, set bids per segment, and add negative keywords at the campaign level. The retail-centric reporting is cleaner and easier to act on.
Performance Max (PMax) is worth testing once your Standard Shopping campaigns have stable conversion history. PMax uses your product feed alongside creative assets (images, headlines, videos) to serve across all Google channels. Many e-commerce advertisers report stronger top-line revenue from PMax, but the reduced transparency makes optimization harder.
The practical recommendation: run Standard Shopping for three to six months, build conversion history, then run a PMax campaign alongside it targeting your best-performing product categories. Compare ROAS over 30 days with equal budgets before committing to either.
According to Google’s Performance Max best practices guide, PMax campaigns perform best when they have at least 50 conversions in the prior 30 days to inform the machine learning model.
Troubleshooting Common Google Shopping Ads Problems
Even well-configured campaigns run into problems. Here are the most common issues and their fixes.
Products not serving: Check Merchant Center for disapprovals first. Then verify that the campaign is not limited by budget, that the product group is not excluded, and that the sales country matches where your products are available.
Low impression share: Your bids may be too low, or your product data may not be matching relevant queries. Improve your product titles to include more specific terms and increase your CPC cap.
High spend, zero conversions: Check your conversion tag first. Use Google Tag Assistant to confirm it fires correctly. If the tag is working, review your landing pages for friction points: slow load times, unclear pricing, or checkout errors.
Feed fetch errors: If you use a scheduled fetch URL, check that the URL is publicly accessible and returns a valid feed format. Authentication-protected URLs will fail silently.
Price disapprovals after a sale ends: When a promotional price expires, your feed must update immediately. If your feed updates on a 24-hour schedule, there is a window where the feed price and the site price diverge. Use real-time feed updates or Merchant Center’s sale price attributes to handle promotions cleanly.
Many businesses find that most Shopping ad problems trace back to feed issues rather than campaign settings. Invest time in feed hygiene and most campaign problems resolve themselves.
Managing a product feed manually across Google Shopping, social channels, and your own website is the kind of work that scales badly as your catalog grows. Embed360 solves this directly: it syncs your listings, pricing, inventory, and images to Google Shopping in real time, uses AI-powered optimization to generate strong product titles and descriptions, and handles multi-channel distribution from a single dashboard. If you are ready to stop chasing feed errors and start focusing on campaign performance, create a free Embed360 account and get your products in front of buyers across every channel that matters.
Frequently Asked Questions
How much does it cost to get started with Google Shopping ads?
There is no minimum spend required to get started with Google Shopping ads. You set your own campaign budget and only pay when someone clicks your ad, making it a cost-per-click model. Many sellers start with a modest daily budget to test performance before scaling. The actual CPC varies by product category and competition. Setting up a Google Merchant Center account and Google Ads account is completely free, you only pay for the clicks your ads receive.
Do I need a website to run Google Shopping ads?
Yes, you generally need a website or online store to run Google Shopping ads. Google requires a verified landing page URL for each product in your feed, and the product data on your site must match what is in your Merchant Center feed. Sellers using platforms like Shopify, Wix, Squarespace, or WordPress can connect their store directly. Tools like Embed360 can automatically sync your product feed and inventory to Google Shopping, removing the need for manual updates.
What is the difference between Google Search ads and Shopping ads?
Google Search ads are text-based and triggered by keywords you bid on. Google Shopping ads, also called Product Listing Ads, display your product image, title, price, and store name directly in search results. Shopping ads are driven by your product feed rather than keyword lists, making them more visual and retail-centric. They tend to attract more qualified leads because shoppers can see the product and price before clicking, which often results in a higher click-through rate for retail inventory.
How long does it take for Google Shopping ads to start working?
After submitting your product feed, Google typically takes 1-3 business days to review and approve your products. Once approved, your Shopping campaign can go live immediately. However, meaningful performance data usually takes 2-4 weeks to accumulate. During this time, automated bidding strategies like Target ROAS need enough conversion data to optimize effectively. It is recommended to monitor your campaign daily in the early weeks and avoid making major changes before you have sufficient data to evaluate results.
How do I optimize my Google Shopping feed to improve campaign performance?
Optimizing your Google Shopping feed starts with writing descriptive product titles that include key attributes like brand, size, color, and material. High-quality product images significantly impact click-through rate. Accurate product attributes such as GTIN, MPN, and category improve how Google matches your ads to relevant searches. Keeping your inventory and pricing updated in real time prevents disapprovals. Tools like Embed360 use AI-powered listing optimization to automatically craft compelling product titles and descriptions, saving time while improving feed quality.
What are the most common reasons Google Shopping ads get disapproved?
Common disapproval reasons include mismatched pricing between your product feed and your website, missing required feed attributes like GTIN or product image, policy violations such as prohibited content, and landing page issues like broken URLs or unavailable products. Keeping your feed updated in real time is the most reliable way to avoid disapprovals. Regularly reviewing the Diagnostics tab inside Google Merchant Center helps you catch and fix feed errors before they impact your campaign’s reach and organic listings.